Every page in PestAnnihilate has its own settings panel that allows you to override global theme settings. This gives you complete control over how individual pages look and behave.
Location
When editing any page, scroll down to find two meta boxes:
-
Page Settings (in the sidebar)
-
Page Customizer Overrides (below the content editor)
Page Settings (Sidebar Meta Box)
Accessing Page Settings
-
Edit any page
-
Look in the right sidebar
-
Find the Page Settings meta box
Available Settings
| Setting | Options | Description |
|---|---|---|
| Page Layout | Default, Full Width, Sidebar Left, Sidebar Right | Controls page layout |
| Custom Sidebar | Default Sidebar or any registered sidebar | Choose which sidebar to display |
| Hide Page Title | Checkbox | Hide the page title completely |
| Featured Image Position | Default, Above Title, Below Title, Hidden | Control where featured image appears |
How to Configure
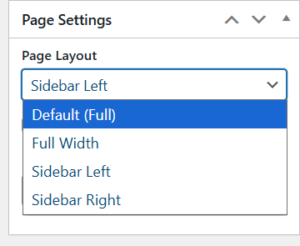
Step 1: Choose Layout
-
In Page Settings, find “Page Layout” dropdown
-
Select your preferred layout:
-
Default – Uses theme customizer setting
-
Full Width – No sidebar, content spans full width
-
Sidebar Left – Sidebar on left, content on right
-
Sidebar Right – Content on left, sidebar on right
-
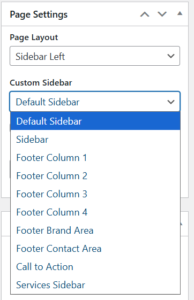
Step 2: Select Custom Sidebar (Optional)
-
If using a sidebar layout, choose which sidebar to display
-
Options include:
-
Default Sidebar
-
Blog Sidebar
-
Footer Widget Areas
-
Any custom sidebars you’ve created
-
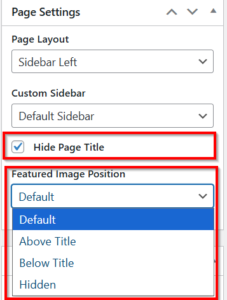
Step 3: Hide Page Title
-
Check this box to hide the page title
-
Useful for:
-
Landing pages
-
Elementor-built pages with custom headers
-
Homepage variations
-
Step 4: Featured Image Position
Control where the featured image displays:
-
Above Title – Image before the page title
-
Below Title – Image after the page title
-
Hidden – Don’t display featured image
-
Default – Use theme customizer setting
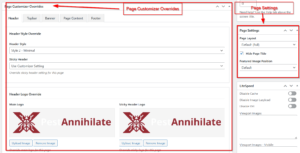
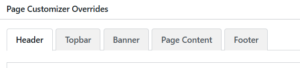
Page Customizer Overrides
This powerful meta box lets you override global theme settings for individual pages. Changes made here only affect the current page.
Navigation Tabs
The Page Customizer Overrides meta box has 5 tabs:
Tab 1: Header Overrides
Settings Available
| Setting | What It Overrides |
|---|---|
| Header Style | Global header style selection |
| Sticky Header | Global sticky header setting |
| Main Logo | Global header logo |
| Sticky Header Logo | Global sticky logo |
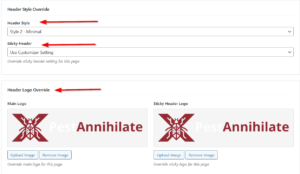
How to Use
Step 1: Override Header Style
-
Go to Header tab
-
Find “Header Style” dropdown
-
Choose:
-
Use Customizer Setting – Use global setting
-
Style 1-4 – Override for this page
-
Step 2: Override Sticky Header
-
Find “Sticky Header” dropdown
-
Options:
-
Use Customizer Setting
-
Enable Sticky Header – Force enable
-
Disable Sticky Header – Force disable
-
Step 3: Override Header Logos
-
Click Upload Image under “Main Logo”
-
Select a different logo for this page
-
Repeat for “Sticky Header Logo” if needed
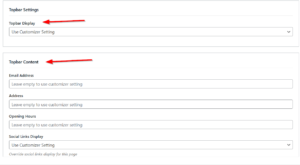
Tab 2: Topbar Overrides
Settings Available
| Setting | What It Overrides |
|---|---|
| Topbar Display | Show/hide topbar |
| Email Address | Global topbar email |
| Address | Global topbar address |
| Opening Hours | Global opening hours |
| Social Links Display | Show/hide social icons |
How to Use
Step 1: Override Topbar Display
-
Go to Topbar tab
-
Find “Topbar Display” dropdown
-
Choose:
-
Use Customizer Setting
-
Show Topbar
-
Hide Topbar
-
Step 2: Override Topbar Content
-
Leave fields empty to use global settings
-
Enter custom values to override for this page:
-
Email Address
-
Address
-
Opening Hours
-
Step 3: Override Social Links Display
-
Choose to show/hide social icons specifically for this page
Example: Landing Page with No Topbar
Banner Overrides
Control the page banner (hero area) for individual pages. This includes background images, colors, and styling.
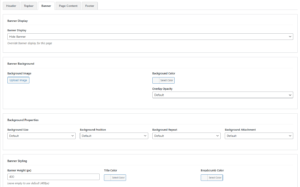
Banner Display
| Setting | Options | Description |
|---|---|---|
| Banner Display | Use Customizer, Show, Hide | Control banner visibility |
Banner Background
| Setting | Description |
|---|---|
| Background Image | Upload custom background image |
| Background Color | Set custom background color |
| Overlay Opacity | Control overlay darkness (0-90%) |
Background Properties
| Setting | Options |
|---|---|
| Background Size | Auto, Cover, Contain |
| Background Position | Center, Left, Right, Top, Bottom combinations |
| Background Repeat | No Repeat, Repeat, Repeat X, Repeat Y |
| Background Attachment | Scroll, Fixed |
Banner Styling
| Setting | Description |
|---|---|
| Banner Height (px) | Custom height (200-800px) |
| Title Color | Color for page title |
| Breadcrumb Color | Color for breadcrumb text |
Step-by-Step: Custom Banner
Step 1: Enable Banner
-
Go to Banner tab
-
Set “Banner Display” to Show
Step 2: Add Background Image
-
Click “Upload Image” under Background Image
-
Select an image from media library
-
Image will appear as preview
Step 3: Adjust Background Properties
Background Size: Cover (fills area)
Background Position: Center Center
Background Repeat: No Repeat
Background Attachment: Scroll
Step 4: Set Colors
-
Choose Background Color (if no image)
-
Set Overlay Opacity (30-50% works well)
-
Pick Title Color (usually white for dark images)
-
Pick Breadcrumb Color
Step 5: Adjust Height
-
Set custom height if needed (default: 400px)
Example: Full Banner Configuration
Background Image: [uploaded-image.jpg]
Background Color: #252428
Overlay Opacity: 40%
Background Size: Cover
Background Position: Center Center
Banner Height: 450px
Title Color: #ffffff
Breadcrumb Color: #ffffff
Tab 4: Page Content Overrides
Overview
Control the main content area styling for individual pages.
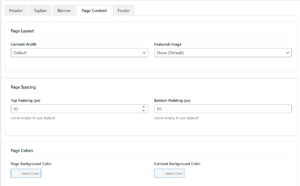
Settings Available
| Setting | Options | Description |
|---|---|---|
| Content Width | Default, Full Width, Boxed | Page content width |
| Featured Image | Show, Hide | Control featured image |
| Top Padding | Number (px) | Space above content |
| Bottom Padding | Number (px) | Space below content |
| Page Background Color | Color picker | Background behind content |
| Content Background Color | Color picker | Background of content area |
How to Use
Step 1: Adjust Layout
Content Width: Full Width (for landing pages)
Featured Image: Hide (if using banner)
Step 2: Set Spacing
Top Padding: 80px (space from header)
Bottom Padding: 80px (space to footer)
Step 3: Customize Colors
Page Background Color: #f4f7fa (light gray)
Content Background Color: #ffffff (white content box)
Tab 5: Footer Overrides
Overview
Customize the footer for individual pages.
Settings Available
| Setting | Options | Description |
|---|---|---|
| Footer Display | Use Customizer, Show, Hide | Control footer visibility |
| Footer Style | Use Customizer, Style 1-3 | Footer layout style |
| Footer Columns | Use Customizer, 1-4 columns | Widget column layout |
| Footer Logo | Upload image | Custom footer logo |
| Watermark Text | Text | Brand watermark |
| Copyright Text | Textarea | Copyright information |
Footer Colors
| Setting | Description |
|---|---|
| Background Color | Footer background |
| Text Color | Main text color |
| Link Color | Link color |
| Link Hover Color | Link hover state |
Footer Elements
| Setting | Options |
|---|---|
| Brand Area | Show/Hide |
| Contact Info | Show/Hide |
| Social Links | Show/Hide |
| Back to Top | Show/Hide |